


KernelSU and KernelSU Next are a root solution by Android developer Tiann. The root tool is a kernel-based root solution for Android devices. With the app, you can root WSA, ChromeOS, and all Android devices. The app will patch boot.img or init_boot.img kernel and root the device for you. Here in this post, we will share the latest version of KernelSU v3.3.0 and KernelSU Next v3.3.0 that support up to Android 16.
We have already shared other root solutions like Magisk and SuperSU, but you know, Magisk may stop developing in the future because of a lack of developers and slow development. SuperSU has already stopped developing the app; now, only old Android versions are supported. KernelSU is a new root solution in the market by Tiann. The app currently supports arm64-v8a and x86_64 architectures and Android GKI 2.0 devices (kernel 5.10+). Older kernels like (4.14+). In this post, we not only share the latest version, but also we will guide you to install KernelSU on your device by patching the boot image.
What is KernelSU?
KernelSU is a modern open-source project that provides advanced superuser (root) services directly in the Android kernel. With it, we have precise access to management over root access, adding one more level of security, allowing the use of system functions, better and more deeply customised, without the risks of conventional use of root.
KernelSU being effective within the Kernel itself, rather than in conventional harsh methods currently as Magisk, gives us clearly the advantages of being much more stable, faster and compatible with custom ROMs, being faster in systems that run the Android Kernel more recent, but bear a little greater risk of failure.
This modern idea of exploit post-kernel goes also gives the advantage of power, led by developers, it gives superior root access more for the automatic and debugging process, as it gives a more permanent condition of climbing root access, while giving advantage to those ROMs of giving better condition of ROM stock, custom ROMs being faster and safe those that give access to root or privileges of using commands of said form.
Features:-
- Kernel-based su and root access management.
- Module system based on Magic Mount and OverlayFS.
- App Profile: Lock up the root power in a cage.
- Fully open-source
Latest KernelSU and KernelSU Next Changelogs:-
Download KernelSU v3.3.0 and KernelSU Next v3.3.0
In this Download section, you can download the Latest KernelSU3.3.0 and KernelSU Next v3.3.0 that support old Android versions 10 to 16.
Install KernelSU or KernelSU Next by patching the Boot image file
1. First backup Phone Apps and Internal Storage. Make sure your device is Bootloader unlocked. Install TWRP Recovery (Optional). Maintain 30-40% battery.
2. Download the latest KernelSU Copy files to internal storage or SD Card and install on your device.
3. Extract the boot file from your device’s latest firmware or download boot or init_boot.img file from the download section.
New Android 14 - Android 17 Firmwere may only have boot.img or vendor_boot.img. So extract boot.img or vendor_boot.img from the firmware.
4. Copy the boot or init_boot.img to your device download folder and open the KernelSU App, or any of the rooting apps.
5. Tap on the Install button at the top, select init_boot.img, or boot.img, and the app will patch and enable SU on the boot file.
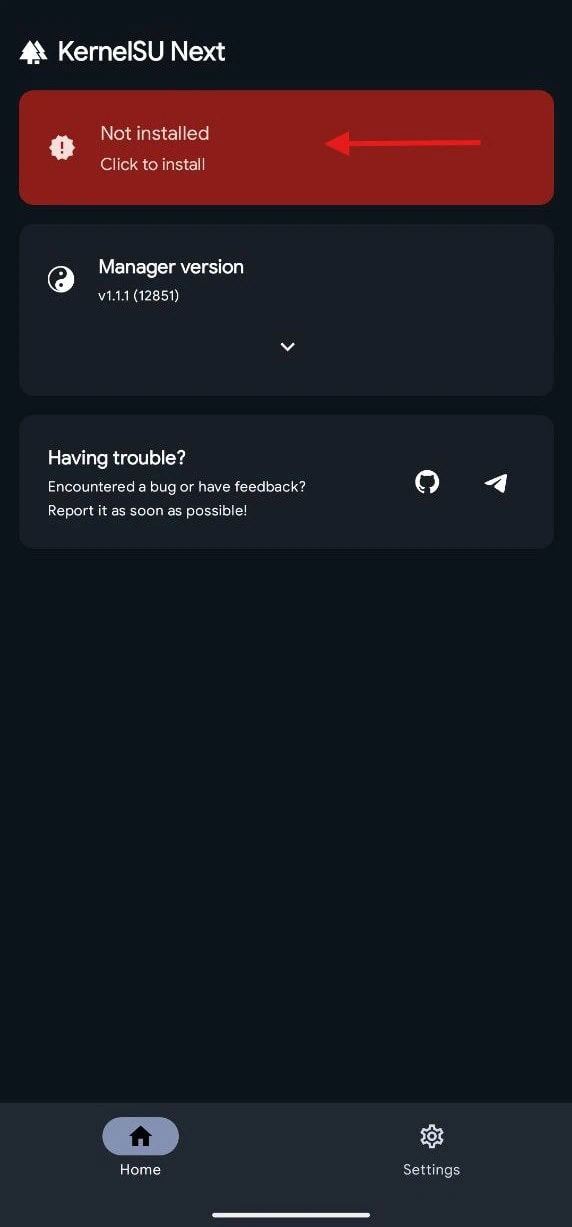
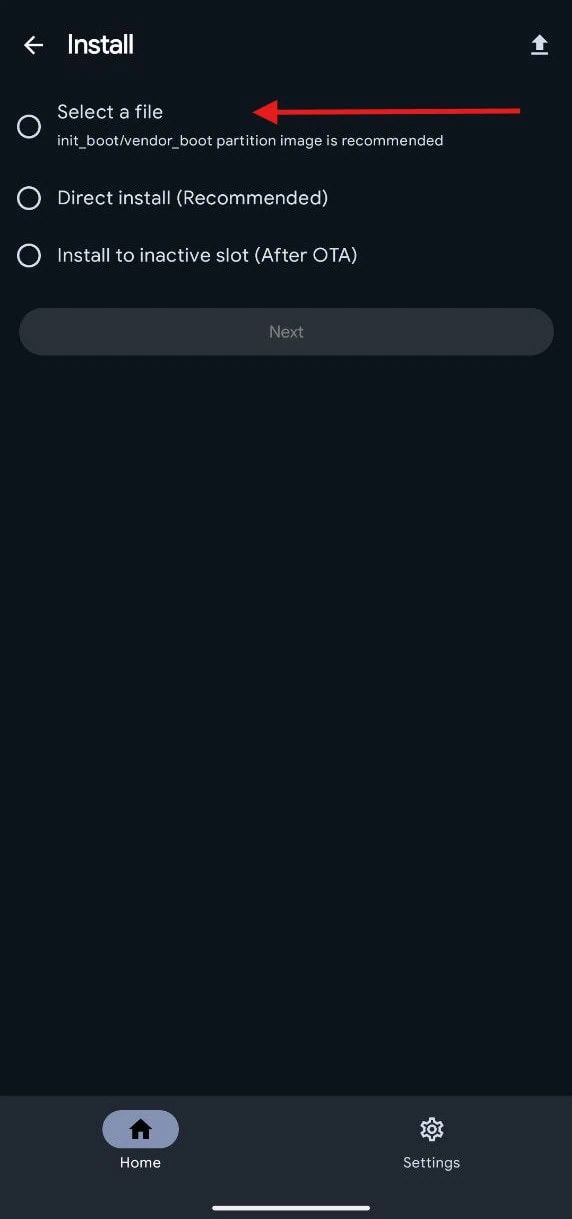
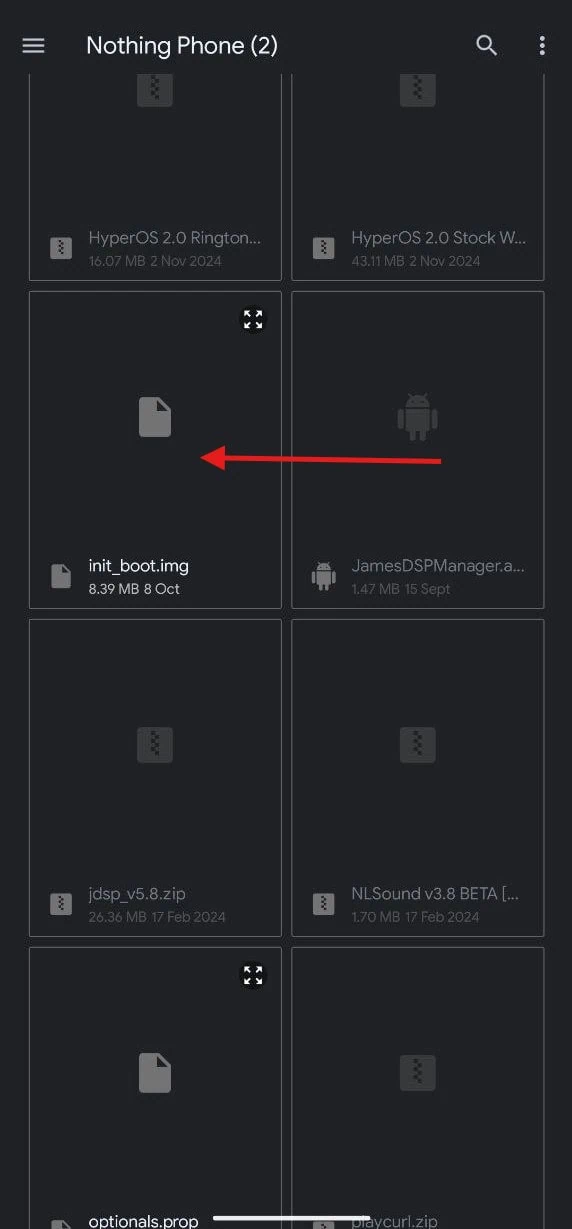
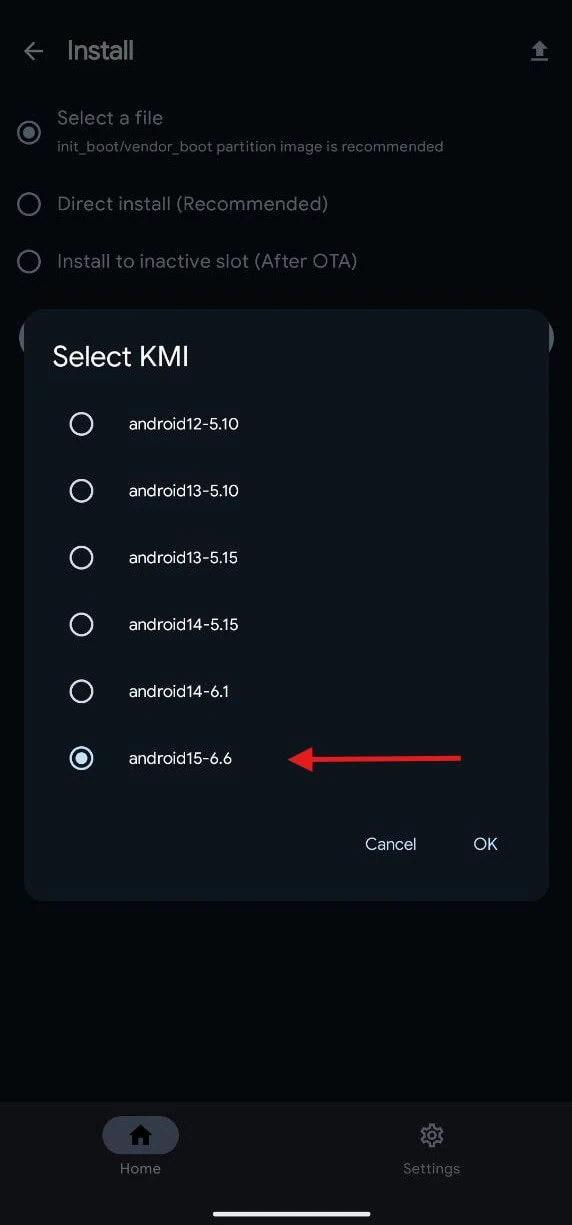
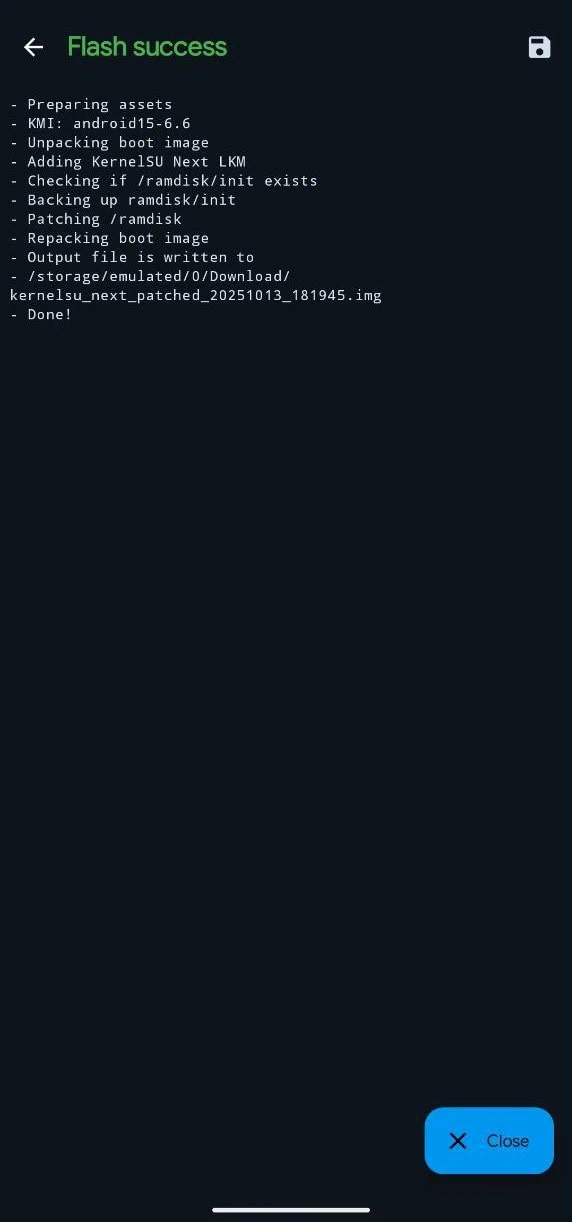
6. Select the KMI (Kernel Version). Kernel Version must match the current firmware Kernel. First, check the Kernel Version in Settings ➡ About Phone ➡ Android Version. The Android Version may be lower, but the kernel version must match the KMI.
For example, I am using a custom kernel - My phone Android Version is 16, but Kernel Version is "5.10.246-gki", which is Android 12, so I will select Android 12-5.10 from the KMI List.
7. After patching, rename the patched image to ksu_patched.img.
The patched boot will be located at /storage/emulated/0/Download/ksu_patched.imgHow to Flash patched KernelSU boot image
1. Download the latest ADB & fastboot tool and unzip it on your PC C:\ Drive.
2. Copy the ksu_patched.img to your pc platform-tools folder
3. Open CMD on your PC and type cd C:\platform-tools and hit enter.
4. Flash the patched boot image by using the commands.
fastboot flash init_boot ksu_patched.imgNew Android Version
fastboot flash boot ksu_patched.imgOr
fastboot flash vendor_boot ksu_patched.img5. Reboot the device manually or type “fastboot reboot” to reboot the device.
6. Open the KernelSU Next app and verify root access and safety net check.
7. Enable Superuser to root Apps From Superuser TAB ➡ Select The App ➡ Turn On Superuser Toggle.
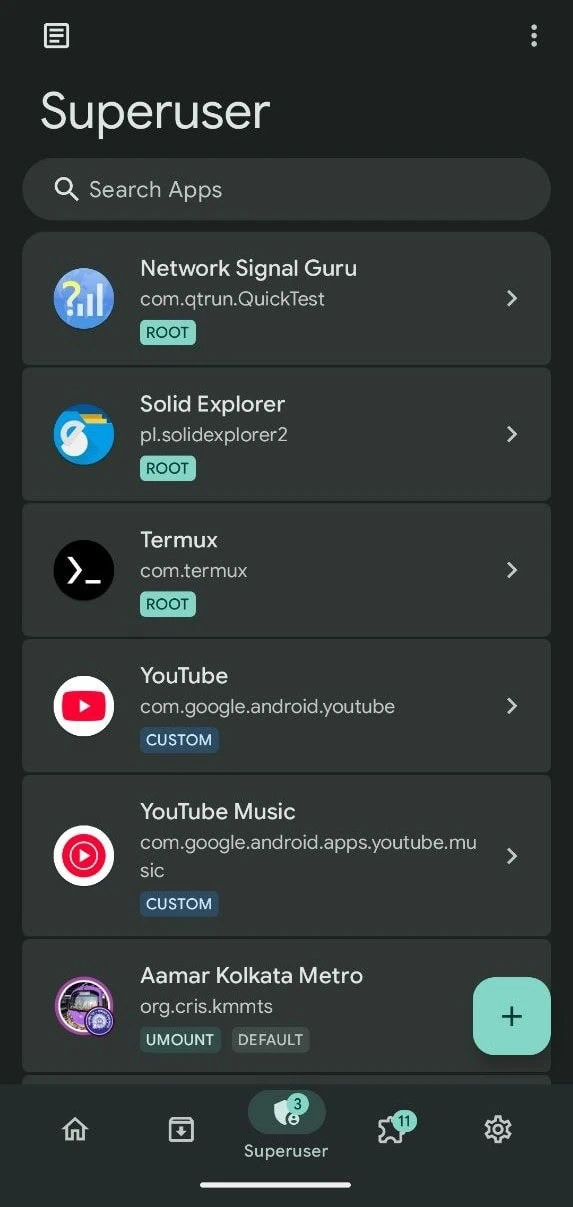
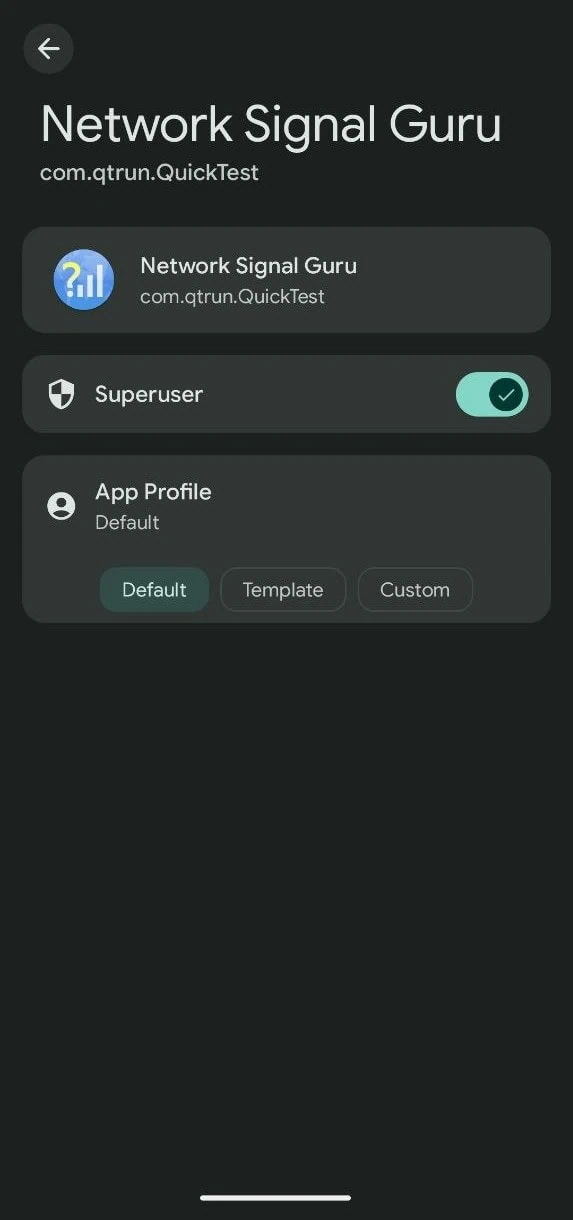
8. Flash SUSFS module from here. And copy the verified boot hash under “root of trust.”
9. Go to /data/adb/VerifiedBootHash and put the string you copied in the text file
10. Finally, restart and hide banking apps using the SUSFS module.
After rooting, some banking apps may not work. The device must get a Full Play Integrity PASS for banking apps to work. Here full guide to Play Integrity PASS on KernelSU: To Fix Banking App Root Detection.
Conclusion
In conclusion, KernelSU or KernelSU Next are a step forward on the way to being able to maintain strong root access on modern Android devices with the correct steps performed to patch the boot image and using KernelSU’s advanced functions to improve speed, customisation, and maintain reliability and security for your device.
This root tool will work satisfactorily for custom ROM fans, and for the automatic functions such as debugging. KernelSU will work for many Android versions, so this will work for knowledgeable users and developers as well. Enjoy the future of the correct management of root for Android with KernelSU and KernelSU Next so that the compatibility will stay and the control over your device will be high.