

Want to improve your Android Phone Audio Quality? You should check the NLSound module. It is a System-wide audio enhancer that improves all of your Android device’s audio output with wired headphones, wireless Bluetooth speakers and the built-in microphone. This tutorial will walk you through downloading and installing the NLSound module and setting it up on your rooted Android device.
NLSound is an audio module for smartphones support Snapdragon processors. Like other audio enhancers, tweak the equalizer settings or boost the volume. NLSound is different; it goes deeper and works directly at the system level. It modifies sample rates, disables harsh audio limiters and improves microphone performance for calls and recordings. It also cuts latency for gaming. Once installed, it runs silently in the background, so you never have to fiddle with it, no annoying alerts either.
NLSound Module Features
- System-level audio enhancement – System level audio enhancement means it works for all apps and services at once. There is no need to set it up for each one.
- Customizable sample rate and bit depth – You can choose your preferred sample rate and bit depth. You can select from usual 16 bit / 48 kHz all the way up to 32 bit float / 384 kHz. That’s studio quality sound.
- Separate volume control for audio and microphones – NLSound provides individual volume controls for audio and microphones. You can boost playback volume independently from microphone recording gain.
- Disable audio limiters and companders – You can also disable audio limiters and compressors. NLSound disables them so music sounds true.
- Reduced Bluetooth latency for gaming – Gamers will love reduced latency for Bluetooth. Optimized Bluetooth audio path reduces lag when using wireless earphones or headsets.
- Automatic disabling of third-party audio processors – The module automatically disables third party audio processors such as MusicFX, AudioFX, Xiaomi Parts and other Original Equipment Manufacturer (OEM) processing effects.
- Customizable volume step count – You can choose from many finer volume steps instead of the usual 15 steps. NLSound lets you increase number of steps for finer control.
- DIRECT_PCM mode support – Direct PCM mode allows bypassing third party audio processing and reduces latency for cleaner path of playback.
- Dolby Atmos parameter tuning – You can fine tune Dolby Atmos parameters even though the module disables some OEM effects and removes artificial limits manufacturers put on calibration database.
NLSound Module on Android
The NLSound module has long been in development and has received continuous support for Android 10 up to the latest 16. This module is lightweight but powerful and does not add much to system partition; it integrates well with Magisk, KernelSU and APatch root solutions too. Other audio mods do not match NLSound performance. It is especially for Qualcomm devices and works closely with Qualcomm audio HAL directly for high-level tuning far beyond what most user apps can do. It is free and open source and there are no premium features or paid tiers either.
Requirements
- Your device must have a Qualcomm Snapdragon processor (SD625 or newer recommended).
- Root access is mandatory – your device must be rooted with KernelSU, SukiSU-Ultra, ReSukiSU or Magisk.
- Make sure you have enough free space in your system partition (at least 50 MB recommended).
- Take a full Nandroid backup of your current ROM before proceeding, just in case something goes wrong.
- Read the entire guide before starting the installation process.
Download NLSound Module
We have shared the latest stable version of the NLSound Module below. Make sure to download the correct version for your device and Android version.
Download Module From – Devdrive Cloud
How to Install NLSound Module on Android
Installing NLSound module is pretty simple but you have to follow instructions carefully. Steps change somewhat depending on whether you root with Magisk or KernelSU.
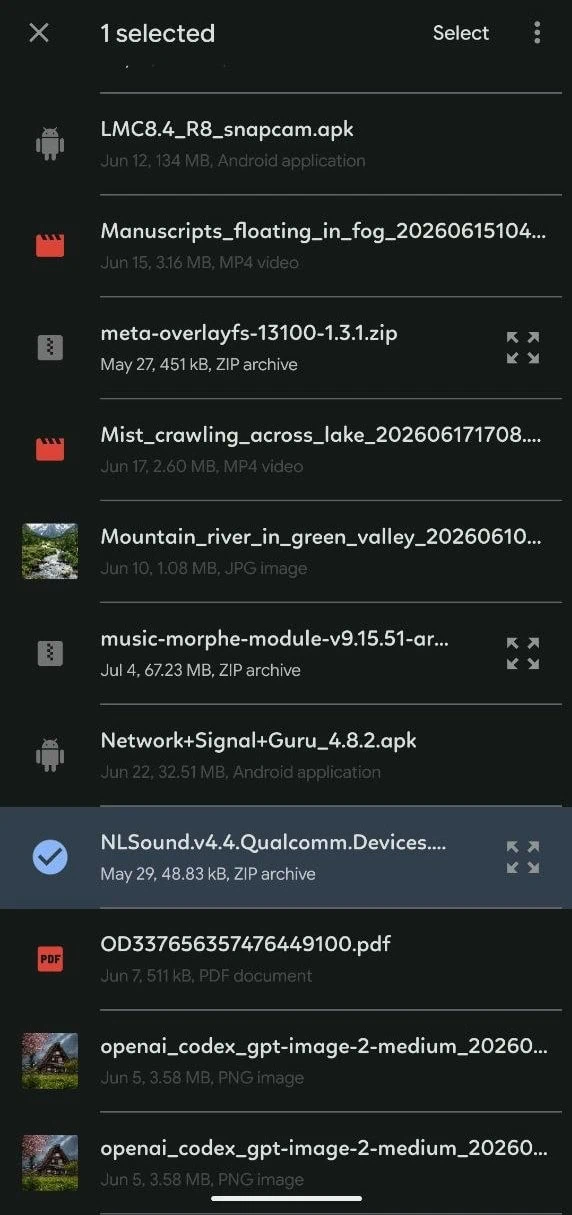
- First, download the NLSound Module zip file from the download section above and save it to your Android device.
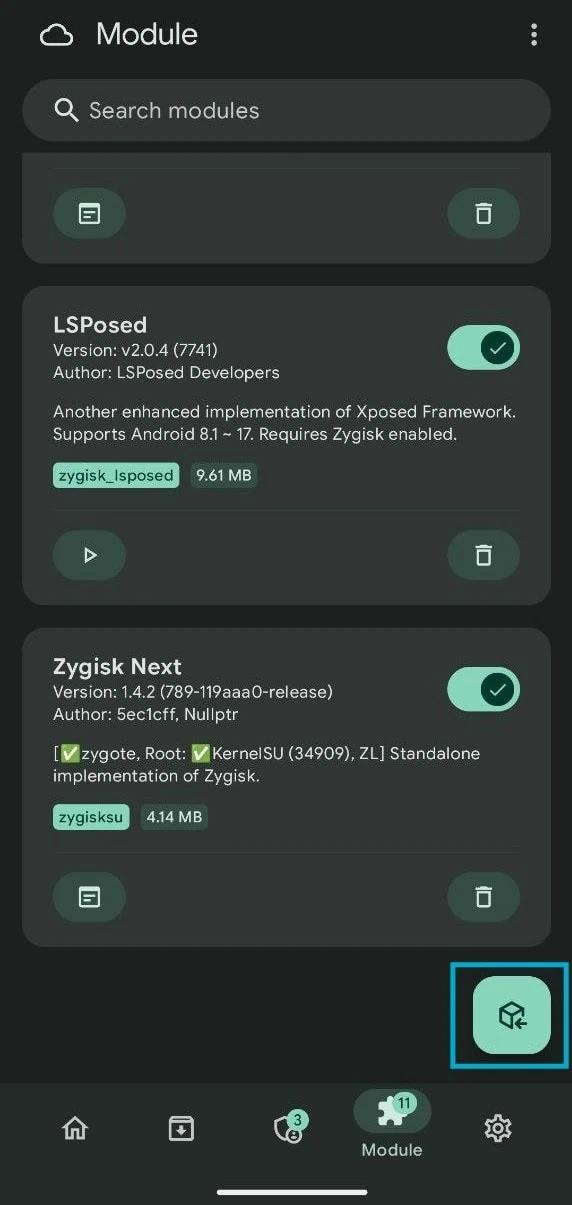
- Then open Magisk Manager or KernelSU app on your phone.
- Go to the Modules Section.
- Hit Install from Storage or Tap Package icon and find the NLSound zip file you just saved.
- Select that file. and follow the screen that you want to optimize and reconfigure.
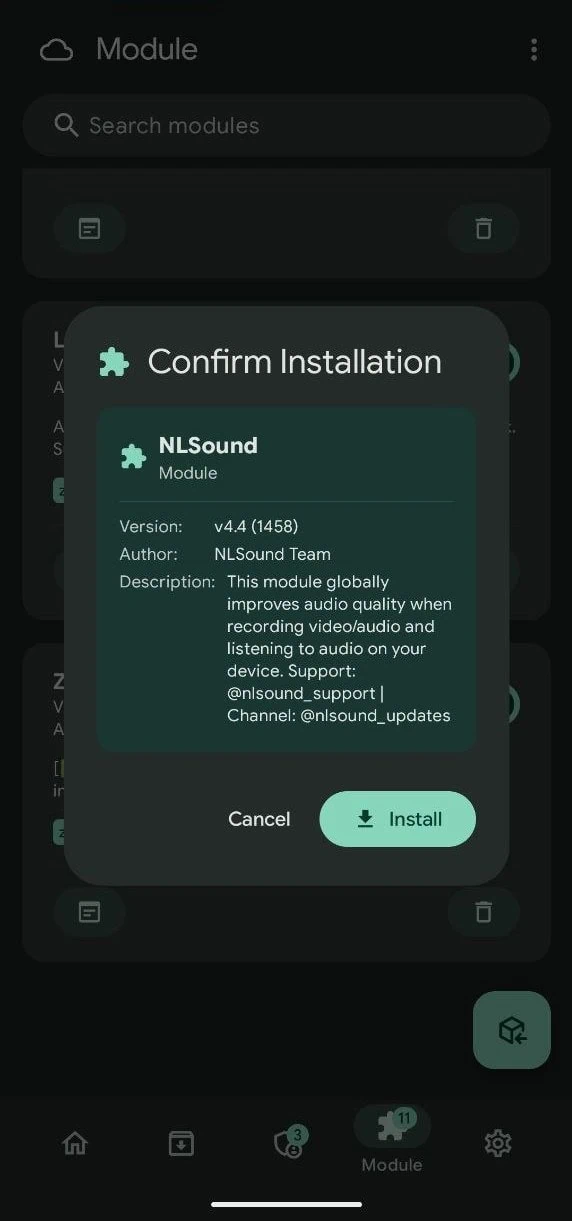
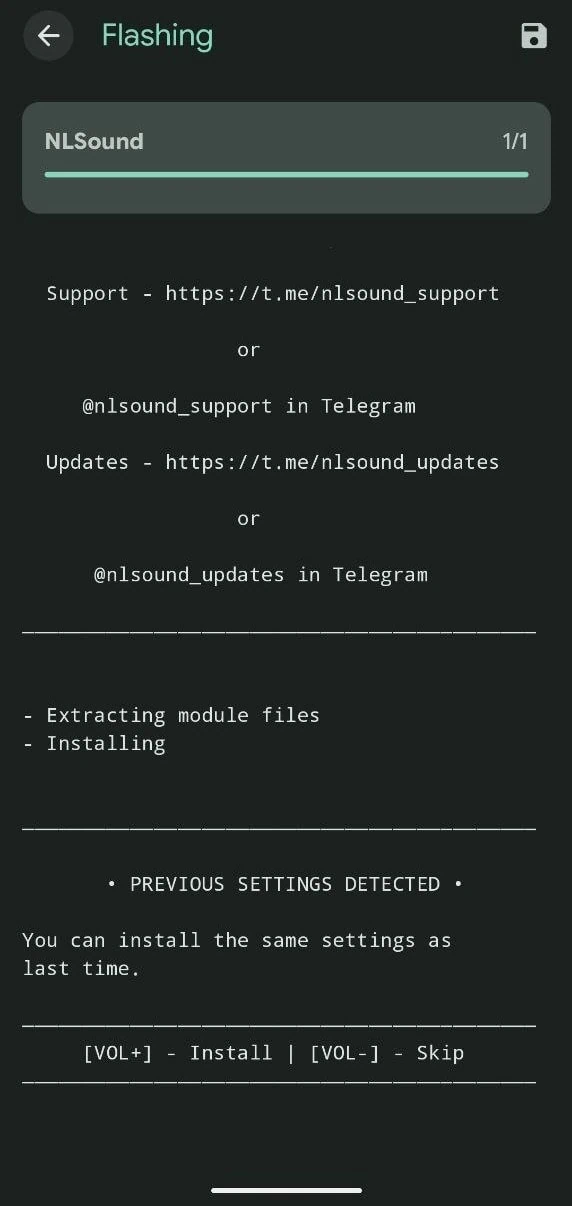
- Here is the common configuration that is best for all smartphones.
* CHOOSE NUMBER OF VOLUME STEPS *
Skip
* CHOOSE MUSIC VOLUME LEVEL *
Skip
* SELECT MICROPHONE SENSIVITY *
102
* SELECT AUDIO BIT DEPTH *
32 bit
* SELECT SAMPLING RATE *
384000 Hz
* DISABLE AUDIO INTERVENTIONS *
Skip
* ADDITIONAL MIXER_PATHS PATCHES *
Install
* BUILD.PROP TWEAKS *
Install
* IMPROVE BLUETOOTH *
Install
* IGNORE AUDIO EFFECTS *
Skip
* INSTALL PERSONALIZED TWEAKS *
Install
* CONFIGURE DOLBY ATMOS *
Install If you have Dolby Atmos
* INSTALL PATCHED ADCB FILES *
SKIP- Finally, when the module flashes successfully, press Reboot to reboot your device.
- After reboot the module will be active no further configuration needed.
Post-Installation Configuration
After installing and rebooting, you can customize the module to your preferences. The modules configuration files are located in the /data/adb/modules/NLSound/ directory if you are using Magisk, or the equivalent KernelSU module directory.
- Use a root file explorer like MT Manager or MiXplorer to navigate to the NLSound configuration directory.
- Open the config file (usually named
nlsound.confor similar) with a text editor. - Adjust the sample rate, bit depth, volume boost levels, and other parameters based on your preference.
- Higher sample rates (192000 Hz or 384000 Hz) provide better audio quality but consume slightly more battery.
- If you use Bluetooth headphones for gaming, enable the low-latency Bluetooth option in the config.
- Save the config file and reboot your device for the changes to take effect.
Troubleshooting
- Module not showing in Magisk/KernelSU: If the module does not show up in Magisk or KernelSU try downloading and flashing the module again. Also check if your root solution is up to date.
- No change in audio quality after installation: Audio quality does not change after installation: First make sure the module is enabled in root manager under Modules. If you haven’t rebooted since installing reboot. Another audio module might also be interfering with NLSound.
- Audio distortion or crackling: If audio sounds distorted or crackling: You likely have set volume boost too high. Open config file and reduce gain. If you have increased sample rate try lowering it to 48000Hz.
- Microphone not working properly: If microphone does not work well: Module has separate controls for microphone gain. Check settings in config file. Too high gain for microphone can corrupt calls and recordings. Set it back to the default level and test again.
- Bluetooth audio cutting out: Audio cuts out using Bluetooth: If you have activated low latency Bluetooth mode, switch it off. Some Bluetooth headphones are not good at handling smaller buffer size.
- Bootloop after installing the module: After installing if you get stuck boot to recovery mode. Use file manager to delete the module from
/data/adb/modules/NLSoundif you use KernelSU boot into safe mode and remove it from list there.
NLSound is a very solid audio mod and covers nearly all possible tweaks. Take your time with settings. Experiment with different sample rates and gain levels until you find sound best for your device. That is where the fun really starts.